JavaScript functions
Posted on 16 May 2019 at 15:00 PM

In this tutorial we'll be looking at the fundementals to JavaScript objects and classes.
- Object overview
- What is an object?
- Accessing attributes/properties
- Attribute assignment
- Object methods
- Pass by reference
- 'this' keyword
- Privacy convention
- Getter/ setter methods
- Built in object methods
- Class overview
What is an object?
An object is a container that stores data - this is in the form of attributes/ properties and as methods. Attribute as a definition means 'a quality or feature regarded as a characteristic or inherent part of someone or something'. In essence its they way we describe the data. A method, on the other hand, is something that the object can do. Its best to think of a real life example - take a dog, it has many attributes that include things like: color, number of legs, a breed etc. A method for a dog is something it does i.e. bark, fetch a ball etc. To create an object and store it, we make a variable and assign it to '{}'. Within the brackets, we use key:value pairs to assign different attributes to the dog.
const berty =
{
breed: 'flat coat retriever',
legs: 4,
color: 'black'
}
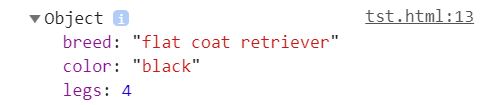
console.log(berty); // returns berty object as depicted below
Accessing attributes/properties
Attributes can be accessed using dot notation or bracket notation.
const berty =
	{
	breed: 'flat coat retriever',
	legs: 4,
	color: 'black'
	}

console.log(berty.breed); // returns 'float coat retreiver'
console.log(berty.legs); // returns 4

console.log(berty['breed']); // returns 'flat coat retreiver'
console.log(berty['color']); // returns 'black'
Objects can become more complex, i.e. you can have nested objects or keys that are assigned to an array. We will touch upon this more later, but as an example, here is how you can chain brackets together to get an array item inside an object.
const berty =
	{
	breed: 'flat coat retriever',
	legs: 4,
	color: 'black',
	fav_food : ['steak', 'lobster', 'chicken']
	}

console.log(berty.fav_food[0]); // returns 'steak'
Attribute assignment
Objects are mutable, even when assigned to 'const' variables. You can either create or update a property by calling it with dot / bracket notation and assigning a value to it.
const berty =
	{
	breed: 'flat coat retriever',
	legs: 4,
	color: 'black',
	fav_food : ['steak', 'lobster', 'chicken']
	}

berty.legs = 3;
console.log(berty.legs); // returns 3

berty.weight = 45;
console.log(berty); // returns object with the new weight attribute
Object methods
An object method is essense the same as a function although it is only accessible to the object. Again, we use key:value pairs to assign the method to a value. Notice how we use an anonimous function and assign to the key.
const berty =
	{
	breed: 'flat coat retriever',
	legs: 4,
	color: 'black',
	fav_food : ['steak', 'lobster', 'chicken'],

	bark: function(){console.log('woof! woof!')}
	}

berty.bark(); // returns 'woof! woof!'
Note, as of ES6, we can ommit the colon and the 'function' keyword. So our bark method can be written shorthand as follows:
const berty =
	{
	breed: 'flat coat retriever',
	legs: 4,
	color: 'black',
	fav_food : ['steak', 'lobster', 'chicken'],

	bark (){console.log('woof! woof!')}
	}
Pass by reference
When we pass an object into the parameter of a function, the object is passed by reference - this means the computer interprets the parameter as pointing to the same space in memory holding that object. This means when an object is passed to a function, it will be permanently mutated.
const berty =
	{
	breed: 'flat coat retriever',
	legs: 4,
	color: 'black',
	fav_food : ['steak', 'lobster', 'chicken'],

	bark: function(){console.log('woof! woof!')}
	}


let change_breed = obj =>
	{
	obj.breed = 'labrador';
	}

change_breed(berty);
console.log(berty.breed); // returns 'labrador'
Notice how the breed of the dog was changed. If we try and do this using reassignment, it does not work in the same way.
const berty =
	{
	breed: 'flat coat retriever',
	legs: 4,
	color: 'black',
	fav_food : ['steak', 'lobster', 'chicken'],

	bark: function(){console.log('woof! woof!')}
	}


let change_breed = obj =>
	{
	obj =
		{
		breed: 'labrador',
		legs: 4,
		color: 'black',
		fav_food : ['steak', 'lobster', 'chicken'],

		bark: function(){console.log('woof! woof!')}
		}
	console.log(obj); // logs the obj above with the breed listed as 'labrador'
	}

change_breed(berty);
console.log(berty.breed); // returns 'flat coat retreiver'
Looping through objects
With other data structures you can loop through them and access items using an index value - i.e. with an array you could use the following code 'array[0]' to get the first item. However, objects not ordered meaning we cannot retrieve items in this manner and doing some will return 'undefined'. With that said we can still loop through using a for in loop - we chain the operations together to access each staff members attributes.
const restaurant_staff =
	{
	staff:
		{
		chef:
			{
			name: 'Chrissy',
			wage: 10
			},
		waitor:
			{
			name: 'Jake',
			wage: 10
			},
		barman:
			{
			name: 'Harry',
			wage: 9
			}
		}
	}


for (let worker in restaurant_staff.staff)
	{
	console.log(worker + ': ' + restaurant_staff.staff[worker].name);
	}
'this' keyword
Using the 'this' keyword gives access from one attribute/ method to another attribute/ method. For example, say with our object berty, we want a method to log the breed to the console - we may write some code as follows:
const berty =
	{
	breed: 'flat coat retriever',
	legs: 4,
	color: 'black',
	breed_type: function() {console.log(breed)}
	}

	berty.breedtype(); // returns 'Uncaught ReferenceError: breed is not defined'
The above code causes an reference error - the attribute 'breed' is not accessible from inside the method 'breed_type()' due to its scope. Here is where 'this' keyword comes into play - if we prepend 'this' on the attribute the method knows where to access the attribute from. Important note: arrow functions do not work with 'this' - it will return undefined, so do not use when using a callback function with 'this' keyword.
const berty =
	{
	breed: 'flat coat retriever',
	legs: 4,
	color: 'black',
	breedtype: function() {console.log(this.breed)}
	}

berty.breedtype(); // returns 'flat coat retriever'
Privacy convention
By design JavaScript does not have any privacy built in for objects - meaning attributes can be updated (even when we may not want them to by other developers, other bits of code etc). As such its convention to prepend an underscore onto the key to let other developers that this attribute should not be changed directly (there are getter and setter methods for these which are coming up next).
const berty =
	{
	_breed: 'flat coat retriever',
	_legs: 4,
	_color: 'black',
	breedtype: function() {console.log(this._breed)}
	}
Getter/ Setter methods
Getter method
Getters are used to return attributes of the property. They are typically cleaner and easier to understand for other developers. You can also use with conditional logic. In comparison to a normal method, you must use the 'get' keyword followed by the function - note you must exclude the colon and 'function' keyword. Lastly, when called they do not need the parenthesis - in this regard they look like an attribute.
const dog =
	{
	_f_name: 'berty',
	_l_name: 'woofington',
	_breed: 'flat coat retriever',
	_legs: 4,
	_color: 'black',

	breedtype: function() {console.log(this._breed)},

	get full_name() {return `${this._f_name} ${this._l_name}`}
	}

console.log(dog.full_name); // returns 'berty woofington'
Setter method
Setters on the overhand, reassign values within an object. Again you can use conditional logic.
const dog =
	{
	_f_name: 'berty',
	_l_name: 'woofington',
	_breed: 'flat coat retriever',
	_legs: 4,
	_color: 'black',

	breedtype: function() {console.log(this._breed)},

	set legs(number) {return this._legs = number}
	}

dog.legs = 3;
console.log(dog._legs); // returns 3
Built in object methods
As well as creating methods for our objects, JavaScript also has some built in methods we can use. In addition there are also object class methods. Its worth going to the documenation and playing around with some of these methods - they can be found at Mozillas Developer Network
const dog =
	{
	_f_name: 'berty',
	_l_name: 'woofington',
	_breed: 'flat coat retriever',
	_legs: 4,
	_color: 'black',

	breedtype: function() {console.log(this._breed)},

	set legs(number) {return this._legs = number}
	}

const dog_keys = Object.keys(dog);
console.log(dog_keys); // returns array of attributes and functions

const dog_entries = Object.entries(dog);
console.log(dog_entries); // returns array of key:value pairs
What is a class?
Classes are used to produce similar objects. For example, say we don't have just one dog but many dogs. We could create a class and then use this class to create multiple instances of the class or, in other words, multiple objects.
Creating a class
To create a class you use the 'class' keyword followed by the name of your class. You then must use the 'constructor()' method, passing in parameters, which instantiates your class when the class is called. We use the 'this' keyword to set the values passed in the parameters in the constructor.
class dog
	{
	constructor(name, breed)
		{
		this._name = name;
		this._breed = breed;
		}
	}
Instantiating the class
To instantiate the class, you use the 'new' keyword followed by the class and pass in the parameters - in our case the name and breed of the dog. We want to save the instance so assign it to a variable.
class dog
	{
	constructor(name, breed)
		{
		this._name = name;
		this._breed = breed;
		}
	}

const berty = new dog('berty', 'flat coat retriever')
console.log(typeof berty); // returns 'object'
console.log(berty); // returns objects with attributes
Adding methods to our class
As with our objects, we can add getter / setter methods to our class, as well as typical methods. To demonstrate, I've added getters to return the name and breed as well as a setter to update the name.
class dog
	{
	constructor(name, breed)
		{
		this._name = name;
		this._breed = breed;
		}

	get name(){return this._name}

	get breed(){return this._breed}

	set name(name){return this._name = name}

	bark(){console.log('woof! woof!')}
	}

const berty = new dog('berty', 'flat coat retriever')
console.log(berty.name); // returns 'berty'
console.log(berty.breed); // returns 'float coat retreiver'
berty.name = 'berty woofington'
berty.bark(); // returns 'woof! woof!'
console.log(berty.name); // returns 'berty woofington'
Class inheritance
Say we also had a cat and we wanted a class which could manage this - this is where class inheritance comes in. Our dog class and cat class share similar attributes and methods - in this example, they share a name and breed. However, we also want to store information about if the cat uses the litter - i.e. its unique to the cat class. Here we can create an umbrella class (an 'animal' class) in which the dog and class 'extends' the umbrella class. As such, they inherit the attributes and methods from the umbrella class. Were a 'child' class has unique attributes or methods you only apply this to this class. What results is a much cleaner and stream lined code - i.e. we no longer have to have two completely seperate classes where we repeat each classes attributes and methods. Lets show an example.
class animal
	{
	constructor(name, breed)
		{
		this._name = name;
		this._breed = breed;
		}

	get name() {return this._name}
	get breed() {return this._breed}
	set name(name) {return this._name = name}
	}


class dog extends animal
	{
	constructor(name, breed)
		{
		super(name, breed);
		//super(breed);
		}

	bark(){console.log('woof! woof!')}
	}


class cat extends animal
	{
	constructor(name, breed,litter)
		{
		super(name, breed);
		this._litter = litter;
		}

	meow() {console.log('meeow meeow')};
	}
In the code above, we have created three classes: 'animal', 'dog' and 'cat' - note that the 'dog' and 'cat' extend the 'animal' class. This means the draw the attributes and methods from the 'animal' class - this is done using the 'super' keyword which tells the dog/cat class to draw the given parameters from the extended class. Hence 'name' and 'breed' are created in the'animal' class. Also note how we are still able to apply unique attributes and methods within each child class. For example, we can still call the unique 'bark' and 'meow' methods as well as the 'litter' attribute.
Creating an instance of the dog class
const berty = new dog('berty', 'flat coat retriever')
console.log(berty.name); // logs 'berty'
berty.bark(); // logs 'woof! woof!'
berty.name = 'berty woofington'
console.log(berty.name); // logs 'berty woofington'
Creating an instance of the cat class
const milow = new cat('milow', 'persian', true)
console.log(milow.breed); // logs 'persian'
milow.meow(); // logs 'meeow meeow'
milow.name = 'meeow meeow';
console.log(milow.name); // logs 'meeow meeow'
Static methods
The final thing of note is that ability to create static methods. This is a method which is created within a class but is only accessibly using the class name - i.e. it cannot be invoked using the instance. To create a static method you use the keyword 'static' and then write as you would any other method. For our example we'll imagine we have soo many animals that we need a method to generate a random name for all our animals.
	class animal
		{
  	constructor(name)
			{
	    this._name = name;
	  	}

	  static generate_name()
			{
	    const names = ['Adam', 'Aaron', 'Abraham', 'Antony'];
	    const random_number = Math.floor(Math.random()*4);
	    return names[random_number];
	  	}
		}

		console.log(animal.generate_name()); // returns 'Aaron'
		console.log(animal.generate_name()); // returns 'Abraham'
		console.log(animal.generate_name()); // returns 'Adam'
Last but not least
Shout out to Berty Woofington...